So you've bought a crawler, run it for a while and now you want to change to a different body. Or maybe you are looking to get into crawling and just don't like any of the bodies that come with the kits. How do you tell what will fit? If it doesn't fit, can you do anything to make it fit? The answers to these questions are simpler than they might seem at first.
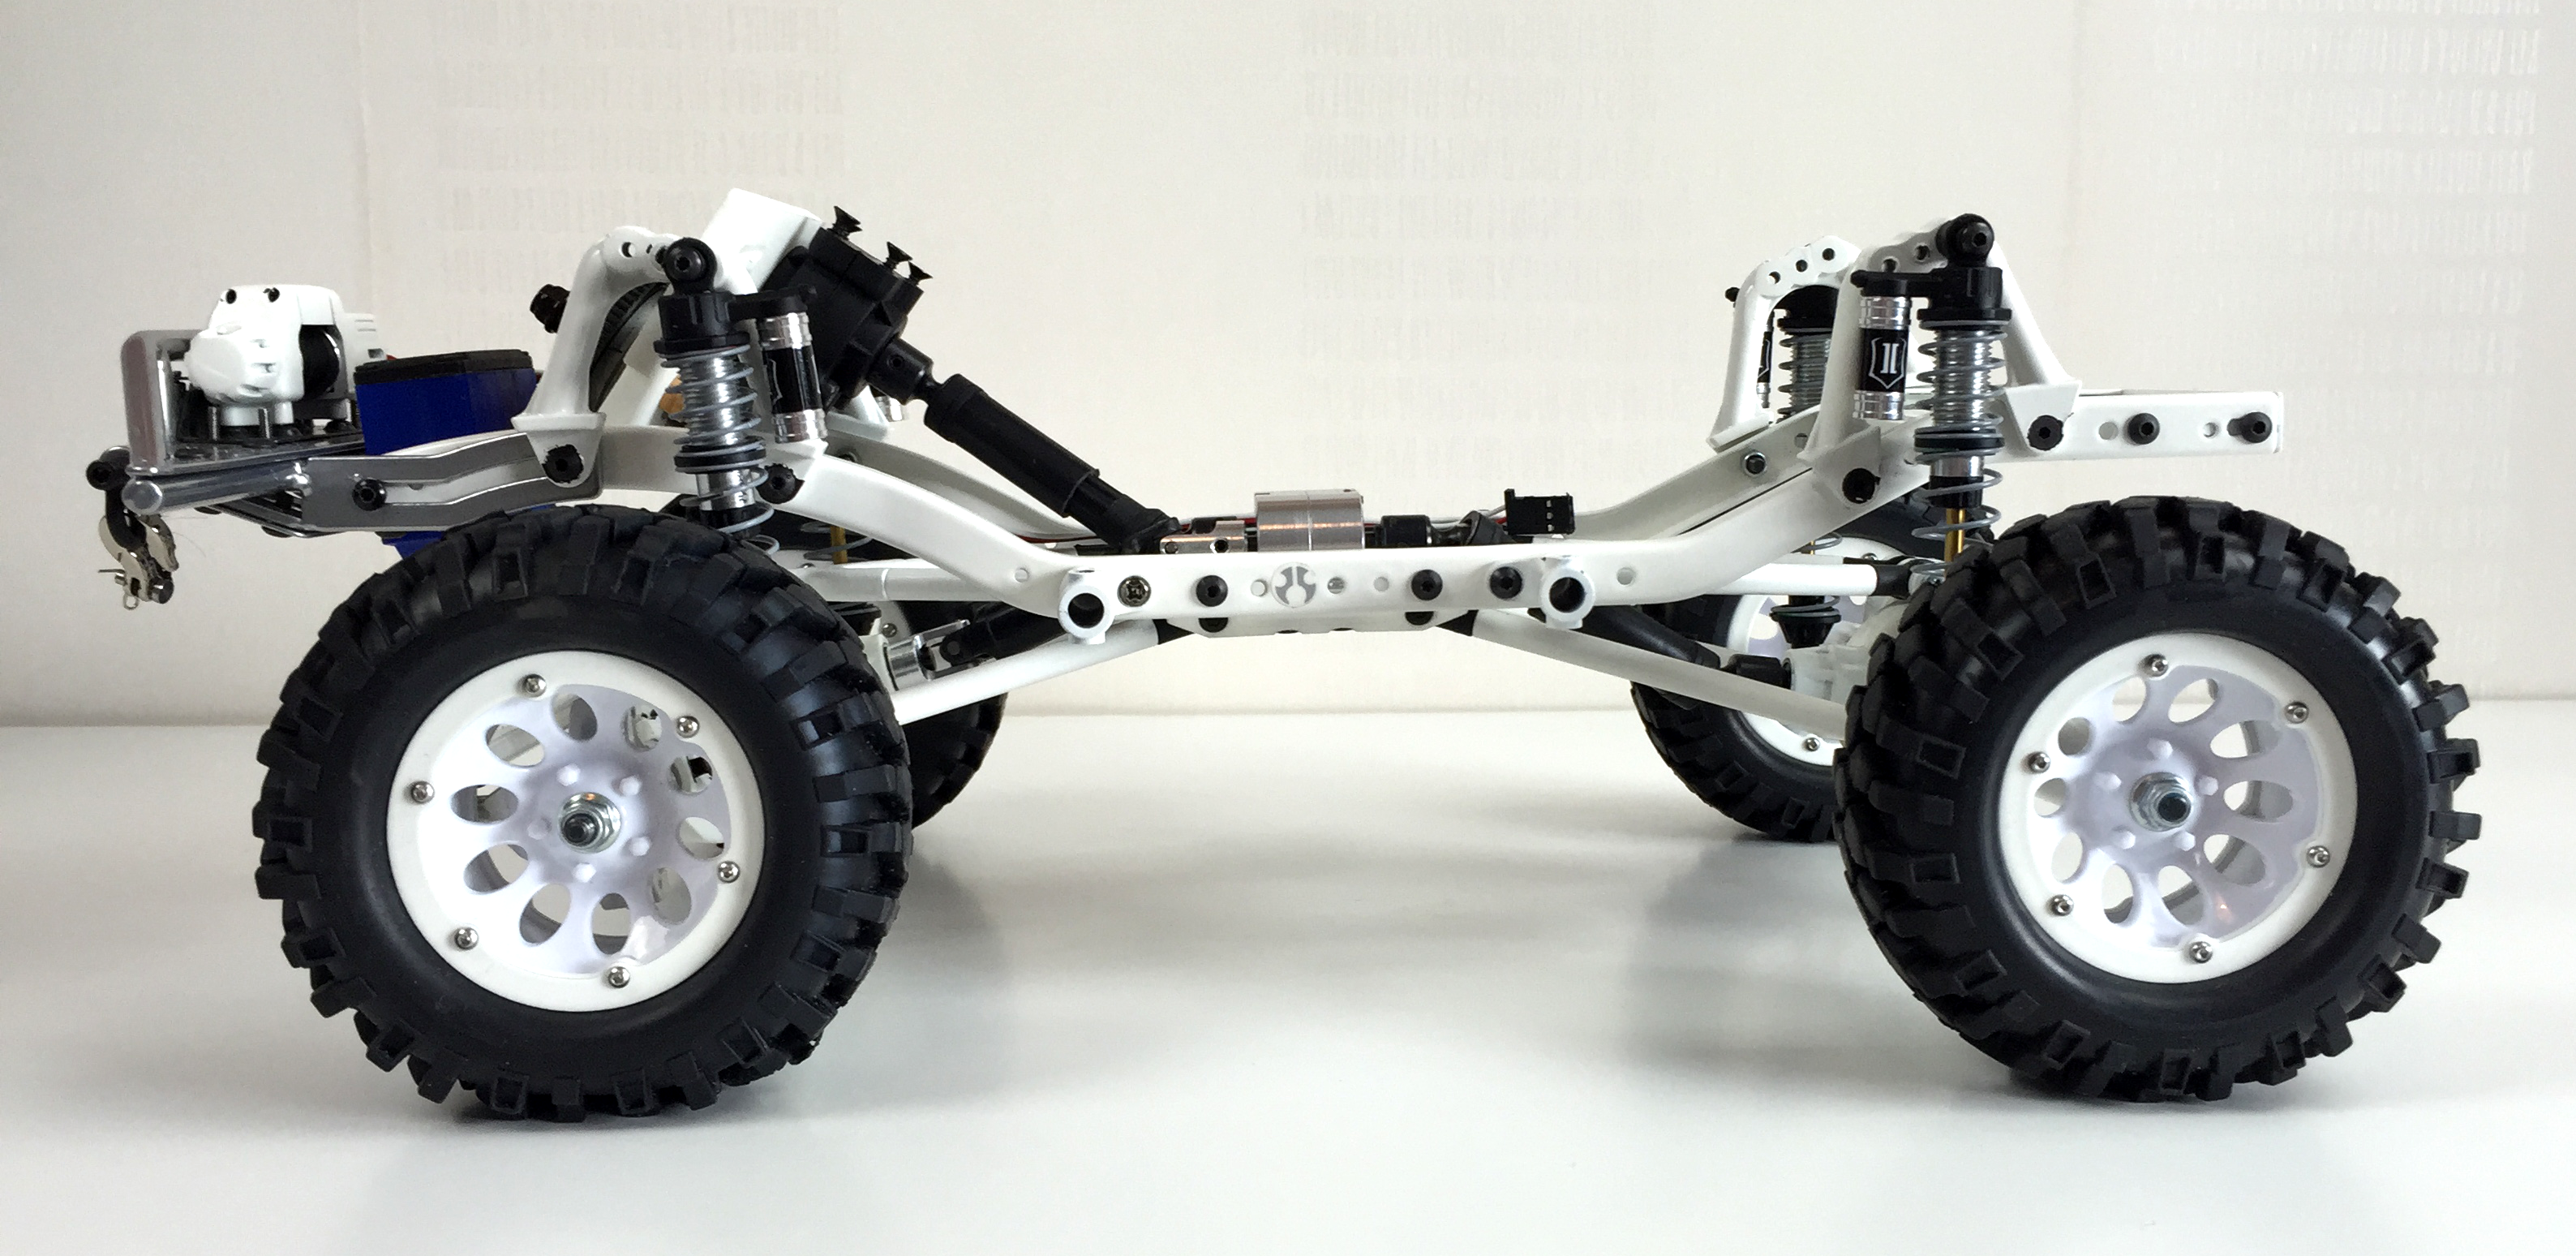
You first need to understand some basic terms. The ones that are most important in this case are "wheelbase" and "track width". The wheelbase is the distance between the front and rear axles at their centers. The track width is the distance between the wheels on the same axle at their center points. These distances are the ones that you need to pay attention to when determining if a body will fit. The wheelbase of a crawler, regardless of manufacturer or model, is determined by the link length and mounting positions and the track width is determined by axle width plus any wideners or spacers.

Common Crawler Wheelbases
The following chart has some of the most common wheelbases with the corresponding vehicles that have that wheelbase.
| Wheelbase | Vehicle Kits & RTRs | ||||
|---|---|---|---|---|---|
|
270mm (10.63in) |
RC4WD Z-RTR0023 Gelande II D90 |
||||
|
275mm (10.83in) |
RC4WD Z-K0051 Gelande II Cruiser |
||||
|
278mm (10.95in) |
Vaterra Ascender Bronco |
||||
|
287mm (11.3in) |
RC4WD Z-K0049 Trail Finder 2 |
GMade GM52000 Sawback |
GMade GS01 Komodo |
||
|
290mm (11.4in) |
Axial AX90021 SCX10 Dingo Kit |
||||
|
305mm (12in) |
Axial AX90036 Jeep Wrangler G6 Falken RTR |
Axial AX90034 Jeep Wrangler G6 Kit |
Axial AX90044 SCX10 Deadbolt RTR |
||
|
313mm (12.3in) |
Axial AX90037 Ram Power Wagon RTR |
Axial AX90035 Jeep Wrangler C/R Edition RTR |
Axial AX90027 Jeep Wrangler Unlimited Kit |
Axial AX90028 Jeep Wrangler Unlimited RTR |
Axial AX90022 SCX10 Trail Honcho RTR |
|
314mm (12.36in) |
Vaterra Ascender K5 Blazer |
||||
|
331mm (13in) |
RC4WD Z-K0047 Gelande II D110 |
||||
If you have a Vaterra Ascender, it has a variable wheelbase that can be set to 278mm, 290mm, 302mm or 314mm (10.95in, 11.4in, 11.89 and 12.36in).
Common Bodies
The following chart has some of the most common wheelbases with the corresponding bodies that fit that wheelbase.
| Wheelbase | Bodies | |||
|---|---|---|---|---|
|
270mm (10.63in) |
RC4WD Z-B0008 D90 |
RC4WD Z-B0058 D90 Pickup |
||
|
275mm (10.83in) |
RC4WD Z-B0109 Cruiser |
|||
|
278mm (10.95in) |
Vaterra Ascender Bronco |
|||
|
287mm (11.3in) |
RC4WD Z-B0092 Blazer |
RC4WD Z-B0084 Mojave 2 |
GMade Sawback | GMade Komodo |
|
290mm (11.4in) |
Axial AX4010R Dingo | Axial AX31268 Jeep Mighty FC | ||
|
305mm (12in) |
Axial AX31176 Spawn | Axial AX31267 Jeep Nukizer 715 | Axial AX04039 Deadbolt | Axial AX04038 Jeep Wrangler |
|
313mm (12.3in) |
Axial AX31132 RAM Power Wagon | Axial AX04033 Jeep Wrangler Unlimited | Axial AX04035 Jeep Wrangler Unlimited Full | Axial AX4025R Trail Honcho |
|
314mm (12.36in) |
Vaterra Ascender K5 Blazer |
|||
|
331mm (13in) |
RC4WD Z-B0064 D110 |
|||
If you do not find a body that interests you in the above list, you can use any other body that you like. The key is to find out what the wheelbase is before you purchase. Then you can check against the wheelbase of your vehicle which is probably in the first chart.
How to change the wheelbase
If you have an Axial SCX10 crawler and want to change from one wheelbase to another using a new Axial body the change is quite simple as Axial provides link kits to change between their three different wheelbases. All you need to do is purchase the link kit, install according to their instructions and put on your new body of choice with the new wheelbase.
| Desired Wheelbase | Link Kit Part Number |
|---|---|
| 290mm (11.4in) | AX30549 |
| 305mm (12in) | AX31142 |
| 313mm (12.3in) | AX30550 |
Axial describes this in a bit more detail on their blog here.
If you want to run a Land Rover D90 body on your SCX10 you need to change the upper and lower links front and rear. You need to purchase two sets of 80mm link pipes and 2 sets of 90mm link pipes. The 80mm pipes are used as the upper links front and rear and the 90mm pipes are used as the lower links front and rear. This is for a 4 link setup, if you are not currently running a 4 link front and rear you may need to purchase the 4 link truss for your vehicle.
But what if you don't drive an Axial SCX10 or what if you want a body that is a different wheelbase than what Axial or any other manufacturer provides? There is also an easy solution to that.
Custom Wheelbases
If you can't purchase a link kit to change the wheelbase of your vehicle, you still have several options. The first thing you need to do is get some information. You need to know what the wheelbase is on your vehicle as well as the wheelbase on the body that you want to use. With those two numbers you will be able to start to figure out what you need to do. Assuming the body you want is not a direct fit, you will either need to have shorter or longer links to adjust the wheelbase of your vehicle to fit the body. There are many ways to figure this out but I prefer a scientific / mathematical approach.
One way you can do this is to create a chassis jig. This doesn't need to be complex and takes more time to describe than it does to build. You can build it with many different materials but here is what I used. What you need are:
- Two pieces of 90 degree angle metal that are at least 60cm (24") long.
- 4 smaller pieces of flat metal that are at least 10cm x 5cm (4" x 2").
- A piece of wood that is at least 70cm x 40cm (27" x 16").
- 10 short wood screws not longer than the thickness of your piece of wood.
- 4 machine screws with lock nuts.
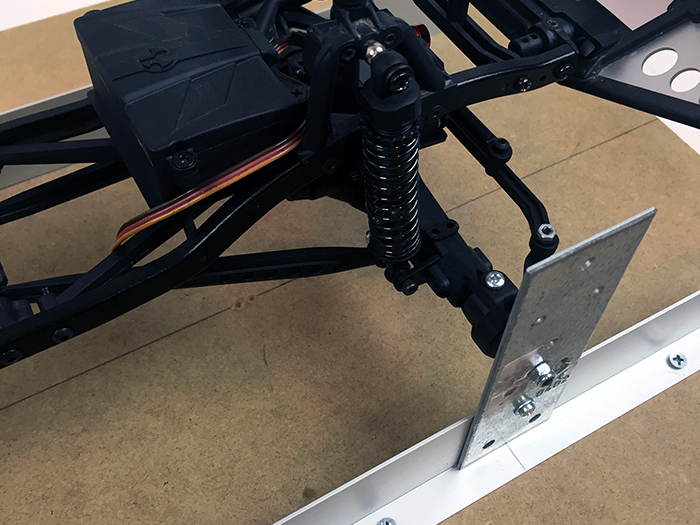
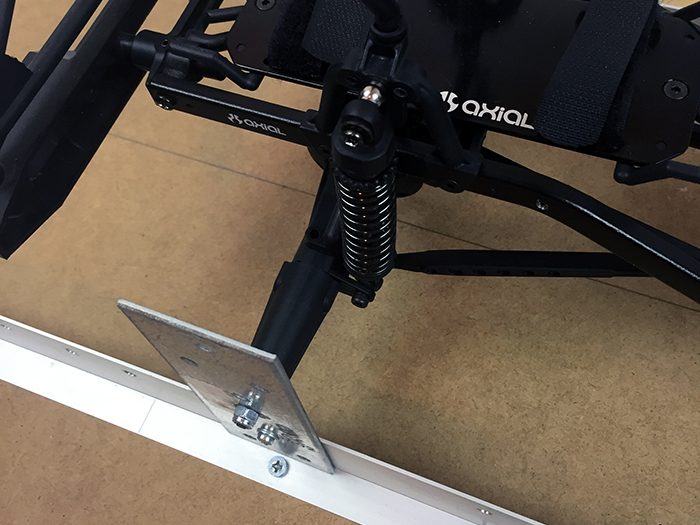
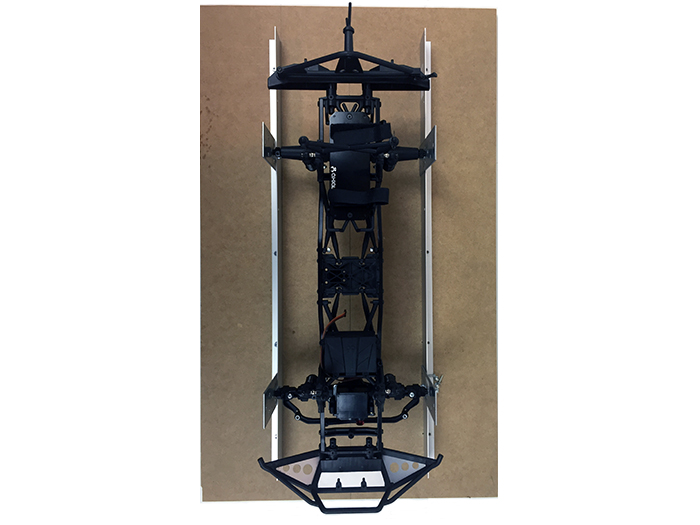
On one side of the 90 degree angle metal, mark the desired wheelbase and drill a hole at each point. On the opposite side of the angle drill at least 5 more holes at even spaces, these are to mount the 90 degree angle metal to the wood board. Next take the 4 smaller pieces of flat metal, hold them vertically against the 90 degree metal and mark the hole that matches your desired wheelbase and drill a hole in each piece at the center line and then drill another hole on that centerline at the other end. Using the machine screws, mount the 4 smaller pieces of metal vertically to the 90 degree pieces of metal. Remove your wheels, shocks and links from the axles and mount the axles into the holes you drilled in the short flat pieces of metal. Now set the assembly down on the board and make sure that the two pieces of 90 degree angle metal are the same distance apart at both ends and screw them down into the board using the 10 short wood screws.If they are not the same distance apart (parallel) none of the measurements from here forward will be of any help to you so it is important to get this part right.
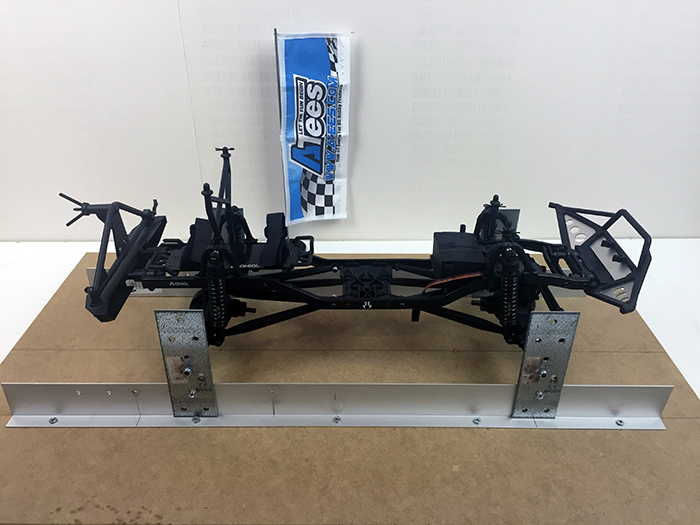
What you now have is a chassis jig that you can re-use over and over. If you want to change the wheelbase in the future you can simply drill new holes in the 90 degree metal for the new wheelbase and repeat the procedure. It is also handy to use if you are doing a lot of work on your chassis and really don't want it moving at all. Another way you can use it is as a nice display stand if you are doing any kind of demonstration and want people to be able to see what the chassis of a crawler looks like but don't want them picking it up.
Now to setup your new links. The goal is to keep the skid plate mostly centered in your new wheelbase. Reattach your shocks and find something to support the skid plate. You can probably use two of your tires or something similar that will keep the chassis at the desired height and the shocks at the desired angle while preventing it from moving around while you take your measurements. Depending on how drastic of a change in wheelbase you are making, you might be able to keep or reuse some of your existing links. If you can't reuse any of your links you will need to measure to get new ones. You need to measure from the mounting holes on the axles to the mounting holes on the chassis. Measure to the center of the hole, not the edge. Do this for all 8 links just to be sure that you have everything square and sitting properly. If you get a different measurement for any pair of links (front top, front bottom, rear top, rear bottom) recheck your measurements first. If they are still different, something is not sitting square somewhere so go back and re-check everything. Start with the 90 degree angle metal rails being parallel and continue checking all measurements making sure that the chassis is sitting parallel with the rails as well as perpendicular to the axles.
With your total length for the new links, you now need to subtract the length of your link ends. If you have a stock Axial kit you might have plastic links, with these you will not be able to reuse the link ends as they are part of the link itself. Stock Axial link ends have varying lengths depending on if you are using straight or bent links, a stock kit uses both depending on the mounting location. For our example, we will use the straight links which are 12mm from the center of the hole on the link end, to the end of the link end. So take your overall length that you measured and subtract 24mm. That will give you the distance between the link ends for each of the links you need to create.
Alternative
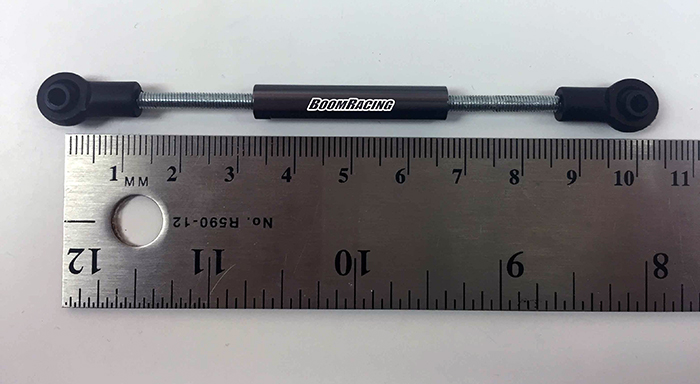
One alternative to creating the chassis jig that is much simpler and only requires some spare parts is to create adjustable links. This method will not be as accurate with getting the exact length but it will do the job just as well. You can do this with:
- 2 Link Ends.
- 1 35mm link pipe
- 2 pieces of 40mm long 3mm diameter (m3) allthread / threaded rod
Thread one link end on each piece of the allthread / threaded rod and then into the link pipe. This will give you a link that is adjustable from 100mm to 115mm by changing how much of the allthread is threaded into the link pipe. You will need to create at least 4 of these so you can adjust one end of your crawler at a time. Once you find the right wheelbase, measure the adjustable links between the link ends and you have the length you need for new link pipes. I do not recommend driving with these adjustable links however as they will not be strong enough for regular use.

New Links
There are several ways to go about getting new links. You can buy m3 allthread / threaded rod, cut it to the length of your center section plus roughly 10mm to give enough rod to go into the link ends. That would give you a link but it wouldn't look very nice or hold up very nicely on the rocks. You could also get some aluminum or carbon fiber tube to go over the threaded rod giving something for the rocks to slide across. However, Boom Racing now has pre-threaded aluminum link pipes that come with two 1mm spacers and grub/set screws to mount the link ends. These pipes are available in both 5mm and 7mm diameters in lengths from 15mm to 120mm in increments of 5mm and in a variety of colors. This gives you a huge range of options to create your own custom links quickly and easily. The grub/set screw has a hex hole for your hex driver on one end. When assembled, the end with the hole should end up inside the link pipe, not inside the link end. With your new Boom Racing link pipes in hand, thread the grub/set screw half way into the link end, thread the link end on to the link pipe and install into your vehicle.
Track Width
There isn't a lot that can be done to change track width without some extreme measures. Most lexan bodies will be roughly the same width so most of the time you don't even have to concern yourself with it. However for that custom or unusual body you may need to change the track width to get just the look you are after. Without doing a lot of custom work, you can only go wider with existing axles. Boom Racing makes wheel wideners in 14mm, 17mm and 20mm lengths to increase the track width of your vehicle. This will push the wheels farther out for those wider bodies.
Conclusion
Changing the body on your crawler isn't nearly as hard as it might seem at first. The tables above give you almost all the info you might ever need to change your body unless you are using a custom body. For those custom bodies the information on creating custom links will get you the rest of the way to having the body of your dreams. We have described two methods to measure and create new custom length links to change the wheelbase of your crawler. The entire process is much easier than it sounds and once you get started you will have a new set of tools and knowledge to work with for your future builds. Good luck!
Comment here
You must be logged in to post a comment.